

Restoring vintage motorcycles is more than just a hobby; it’s a passionate pursuit that allows enthusiasts to breathe new life into classic machines that have defined eras of engineering and design. The process of restoration is an art form that combines mechanical skills, creativity, and a deep appreciation for two-wheeled history. This guide aims to provide detailed, step-by-step instructions for anyone looking to embark on their own motorcycle restoration project.
Vintage motorcycles, often celebrated for their unique styles and intricate engineering, require careful attention to detail during a restoration. Each model tells a story, reflecting the technological advancements and cultural values of its time. To successfully restore such a motorcycle, one must not only focus on appearance but also ensure its functionality, preserving its original spirit while making it roadworthy again.
Throughout this guide, you’ll discover essential techniques, recommended tools, and best practices that will lead you through the various stages of restoration. From assessing the bike’s condition to sourcing authentic parts, and from the meticulous disassembly to the final touches, this comprehensive approach will equip you with the knowledge needed for a successful vintage motorcycle restoration.
Assessing the Condition of Your Vintage Motorcycle for Restoration
Before diving into the restoration process, it’s essential to carefully assess the condition of your vintage motorcycle. This assessment will provide a clear understanding of what repairs and modifications are necessary to bring the bike back to its original glory.
Start by examining the motorcycle frame for any signs of rust, cracks, or damage. The frame is crucial for the structural integrity of the bike, and any issues here will need to be addressed first. Look closely for any areas where the paint has chipped away, exposing metal surfaces that may be susceptible to corrosion.
Next, evaluate the engine and mechanical components. Check for oil leaks, a lack of compression, or unusual noises when turning the engine over. If possible, perform a compression test to gauge the engine’s condition. Pay close attention to vital parts such as the carburetor, fuel lines, and electrical system. These components are often responsible for the bike’s performance and may require significant work during the restoration process.
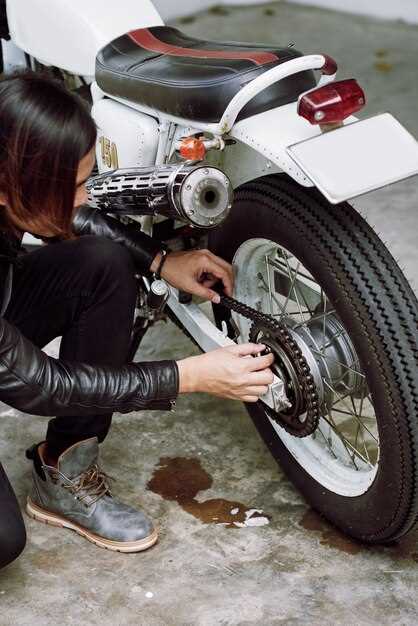
Inspect the wheels and tires for wear and damage. Check the rims for bends or cracks and ensure that spokes are intact and secure. Tires may need replacement if they show signs of dry rot or have a significant amount of tread wear. Remember, safety is a priority, and riding on compromised wheels can be dangerous.
Don’t forget to assess the condition of the motorcycle’s bodywork. Look for dents, scratches, and signs of previous repairs. Evaluate whether the original paint is salvageable or if a complete repaint is necessary. This can have a significant impact on the final look of your restored motorcycle.
Lastly, consider the availability of parts for your specific vintage model. Some motorcycles have a vast aftermarket for replacement components, while others might require extensive sourcing for original parts, which can influence the restoration process’s feasibility and cost.
By thoroughly assessing your vintage motorcycle, you will establish a solid foundation for planning your restoration project. This step ensures that you understand the scope of work ahead and can allocate your time and resources effectively to achieve the best results.
Gathering Necessary Tools and Parts for a Successful Restoration
Restoring vintage motorcycles requires a well-thought-out approach, particularly in collecting the necessary tools and parts. This phase is crucial, as having the right equipment and components will significantly impact the quality and efficiency of your restoration project.
Start with a comprehensive checklist of tools. Essential items include wrenches, socket sets, screwdrivers, pliers, and a torque wrench. Additionally, specialized tools like motorcycle stands, alignment tools, and tire changers may be necessary depending on your specific motorcycle model. Investing in quality tools can save time and ensure that work is completed safely and effectively.
Next, identify the parts that need replacement or refurbishment. This may involve examining the engine, fuel system, electrical components, and bodywork. Creating a detailed inventory of required parts is essential. Consider elements like gaskets, filters, tires, and brake pads that may need to be sourced. Some vintage motorcycles have specific requirements, making it vital to research compatibility before purchasing.
Utilize various sources for obtaining parts. Online marketplaces, specialized vintage motorcycle shops, and forums can offer leads on authentic or reproduction components. Networking with clubs or enthusiasts often yields valuable insights and access to hard-to-find items. Additionally, salvage yards can be treasure troves for unique parts, providing opportunities to restore your motorcycle with original components.
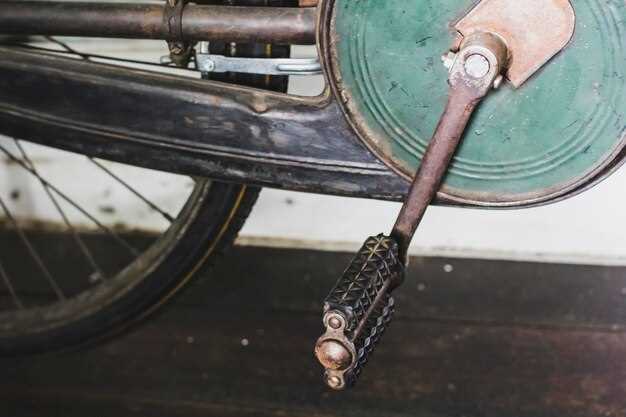
Don’t overlook the possibility of refurbishment. Some parts, like the frame or wheels, may simply need cleaning or painting rather than full replacement. Developing skills in restoration processes like painting, polishing, or reupholstering seats can reduce costs and personalize your motorcycle further.
Planning your project timeline is also important while gathering tools and parts. Having everything organized before beginning will facilitate a smoother restoration process. This proactive approach means fewer interruptions and helps maintain momentum as you work on your vintage motorcycle.
In conclusion, gathering the necessary tools and parts is a foundational step in the restoration of vintage motorcycles. By being thorough and strategic, you can enhance your chances of achieving a successful outcome that honors the bike’s heritage while delivering functionality and style.
Executing Restoration Techniques: From Engine Overhaul to Paint Finishing
Restoring a vintage motorcycle is an intricate process that involves multiple techniques, each vital for achieving a successful outcome. This guide explores essential restoration practices, from performing an engine overhaul to achieving a pristine paint finish.
Engine Overhaul: The heart of any motorcycle lies in its engine. Begin by disassembling the engine to inspect its components thoroughly. Look for signs of wear such as scoring on the cylinder walls or excessive play in the bearings. Cleaning all parts is crucial, so use a solvent to remove old oil and carbon deposits.
Next, replace any worn gaskets and seals to ensure proper sealing. A common upgrade during restoration is to replace stock pistons with higher compression versions for improved performance. Reassemble the engine with new, high-quality fasteners and, if necessary, consider balancing the crankshaft for smoother operation.
Transmission and Final Drive: After addressing the engine, pay attention to the motorcycle’s transmission. Clean and lubricate all internal components, replacing any damaged parts. If the motorcycle utilizes a chain or belt drive, inspect for wear and tension; replace as needed to ensure optimal performance.
Electrical System: Next, focus on the electrical system. Vintage motorcycles often come with outdated wiring. Replace frayed wires and outdated connectors. A new battery is essential for reliable starting and lighting. Enhance visibility by updating old bulbs with modern LED equivalents while keeping vintage aesthetics in mind.
Frame and Suspension: Inspect the frame for rust or structural issues. Sand down any rust spots and apply a rust-inhibiting primer followed by paint. The suspension should also be evaluated; replace fork seals and consider upgrading to modern shock absorbers for improved ride quality. Ensure all mounting points are secure and well-lubricated.
Paint Finishing: The final step in restoration is the paint job. Start by stripping the frame and components to bare metal. Sanding will eliminate imperfections, creating a smooth surface for painting. Apply a quality primer to enhance paint adhesion.
Choose a color that reflects the motorcycle’s era, often leaning towards classic hues. Apply several light coats of paint, allowing ample drying time between layers. Finish with a clear coat for protection and added shine, ensuring the exterior not only looks appealing but also withstands the test of time.
Completing a vintage motorcycle restoration requires patience and attention to detail. By executing these restoration techniques meticulously, you’ll not only preserve history but also create a motorcycle that can be enjoyed for years to come.


