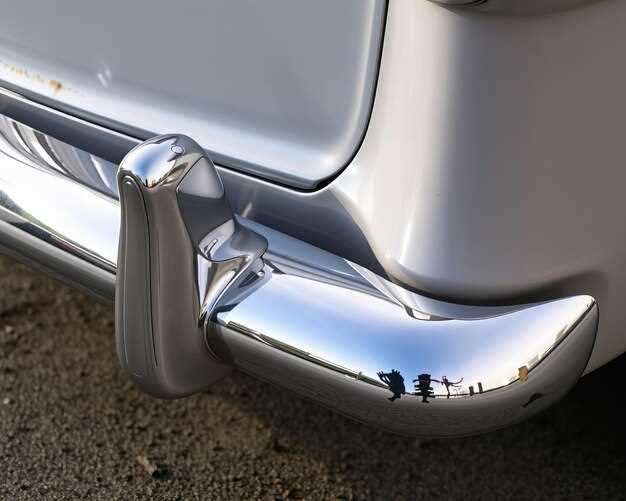

Restoring chrome trim can be a rewarding project, transforming dull and tarnished surfaces back to their original shine. Over time, chrome trim may become oxidized or scratched, losing its luster and appeal. With the right techniques and materials, you can bring back that mirror-like finish efficiently and effectively.
One of the most crucial steps in this restoration process is the application of quality polish. Using the proper polish not only helps in removing imperfections but also protects the chrome from future damage. The aim is to select a polish specifically formulated for chrome, which ensures optimal results without causing further harm to the surface.
In addition to polish, proper preparation is essential for a successful restoration. Thoroughly clean the chrome trim to remove dirt, grime, and any previous cleaning products. This preparation allows the polish to work more effectively, resulting in a shine that looks as good as new. In this article, we will explore expert tips and methods that will guide you through each step of the restoration process, ensuring your chrome trim retains its brilliance long into the future.
Assessing the Condition of Your Chrome Trim: Key Indicators

Before undertaking any restoration project, it’s crucial to evaluate the current state of your chrome trim. Assessing its condition will help determine the appropriate steps needed for effective restoration.
1. Visual Inspection: Begin with a thorough visual examination of the chrome trim. Look for signs of corrosion, pitting, and oxidation. These indicators suggest that the chrome has been compromised and may require extensive polish or even replacement if the damage is severe.
2. Reflection Quality: A well-maintained chrome surface should reflect light clearly. If the trim appears dull or hazy, it may benefit from a good polishing session. Lack of luster typically denotes the presence of surface contaminants or oxidation.
3. Surface Feel: Run your fingers over the chrome surface. A smooth feel is a positive indicator of good health, while roughness or irregularities signal that the trim may need restoration. Rust spots or texture changes can lead to further deterioration if not promptly addressed.
4. Water Beading: When you wash the chrome trim, observe how water interacts with the surface. Water should bead and roll off easily. If it flattens out and adheres, the protective coating is likely compromised, calling for an immediate clean and polish to restore its shine.
5. Longevity Signs: Consider how long the chrome has been exposed to the elements and environmental factors. Aged chrome may exhibit more wear and tear. Restoration techniques, including polishing and sealing, can help reinvigorate older trims.
By paying close attention to these key indicators, you can accurately assess the condition of your chrome trim and determine the best course for effective restoration and maintenance.
Step-by-Step Guide to Selecting the Right Chrome Polish

Choosing the right chrome polish is crucial for effective restoration of chrome trim. The first step is to identify the specific type of chrome finish on your vehicle or item. Some finishes may be more delicate and require a gentler polish. Check for labels or manufacturer guidelines to determine compatibility.
Next, consider the condition of the chrome. If it’s heavily oxidized or corroded, you may need a more abrasive polish to tackle the deeper imperfections. For minor blemishes and routine maintenance, a non-abrasive, pre-treated polish may suffice.
Read reviews and product labels to assess the effectiveness of various polishes. Look for polishes that contain essential nutrients and protective agents that not only restore shine but also prevent future damage. Brands that specialize in automotive care tend to offer reliable options for chrome restoration.
Once you’ve narrowed down your choices, purchase a couple of small sizes to test before committing to larger quantities. This allows you to evaluate their effectiveness on your specific chrome surfaces without a significant investment.
Lastly, consider environmental factors such as temperature and humidity, as these can influence the application of the polish. Ensure you select a product that is suitable for the conditions in which you will be working.
Techniques for Application and Buffing to Achieve a High Shine
Restoration of chrome trim requires precise techniques for both application and buffing to achieve a high shine. Begin by ensuring the chrome surface is clean and free from dirt, grease, and oxidation. Use a mild detergent solution and a soft cloth to gently wash the area, followed by a thorough rinse and drying with a microfiber towel.
For the application process, select a quality chrome polish that contains non-abrasive compounds. Apply a small amount of polish to a clean, soft cloth or foam applicator pad. Using circular motions, work the polish onto the chrome surface, ensuring even coverage. Focus on sections at a time to ensure thorough restoration. Allow the polish to sit for the manufacturer-recommended time to maximize its effectiveness.
Once the polish has set, it’s time to buff the chrome trim. Use a separate clean microfiber cloth for buffing. Gently rub the surface using overlapping circular motions. This technique helps to remove any remaining polish residue while enhancing the shine. For optimal results, apply varying pressure–lighter pressure at the beginning and gradually increasing as needed to achieve that brilliant finish.
To enhance the longevity of the restoration, consider using a protective sealant after buffing. This will create a barrier against moisture and environmental damage, helping to maintain the shine over time. Regular maintenance, including periodic polishing and cleaning, will keep your chrome trim looking new and well-restored.


