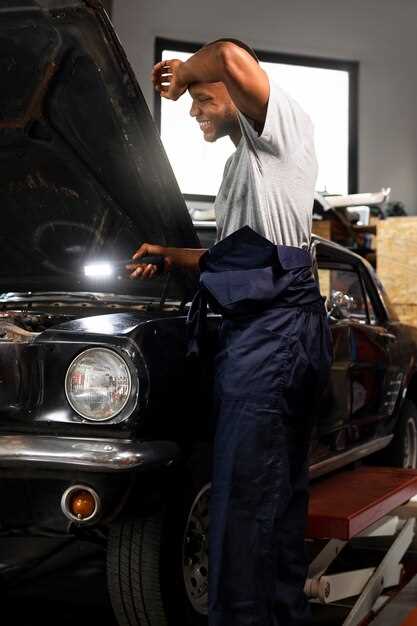

Classic car restoration is a rewarding yet challenging journey that enthusiasts undertake to breathe new life into timeless vehicles. The passion for restoring a vintage car goes beyond mere aesthetics; it involves understanding the intricacies of automotive history and mechanics. This guide aims to equip beginners with essential techniques and insights to navigate their first restoration project effectively.
Before diving into the restoration process, it’s crucial to have a clear vision of what you want to achieve with your classic car. Whether you aim to restore it to showroom condition or create a unique custom build, the approach will significantly impact the methods and tools you choose to employ. Understanding the basic principles of car restoration will help you make informed decisions throughout the project.
In this article, we will explore various aspects of classic car restoration, from assessing the initial condition of the vehicle to selecting appropriate materials and techniques for repairs. We will also cover important tips for planning and budgeting, ensuring that your restoration journey is both enjoyable and successful. With the right knowledge and a bit of patience, transforming a neglected classic car into a cherished masterpiece is within your reach.
Choosing the Right Tools for Your Restoration Project

When embarking on a classic car restoration project, selecting the right tools is crucial for achieving quality results. The right set of tools not only enhances efficiency but also ensures that the restoration process is enjoyable and successful.
Start with a basic toolkit that includes essential hand tools such as wrenches, screwdrivers, pliers, and sockets. These tools will help you tackle most assembly and disassembly tasks without complications. Ensure that you choose high-quality tools made from durable materials, as they will withstand the rigors of car restoration.
Power tools are also important in a restoration project. A good electric or cordless drill is indispensable for drilling and fastening tasks. A sander and a grinder can significantly speed up the process of removing old paint and rust, allowing you to prep surfaces for new finishes. Always prioritize safety by wearing protective gear when operating power tools.
Moreover, specialized tools are essential for specific tasks in restoration. For example, an engine hoist is crucial for safely removing and reinstalling the engine, while a torque wrench ensures that you achieve the correct tension on critical bolts. Investing in these specialized tools may save you time and prevent potential damage to your vehicle.
Don’t forget about measuring tools, such as calipers and tape measures, to ensure precision in your work. Accurate measurements are vital when fitting new parts to guarantee they align perfectly with your classic car’s specifications.
Lastly, maintaining your tools is just as important as choosing them. Keep them clean, store them properly, and perform regular maintenance to extend their lifespan. This diligence will ensure that you are always ready to tackle your restoration project with the best tools at your disposal.
Step-by-Step Guide to Bodywork and Paint for Vintage Cars
Restoring the bodywork and paint of a vintage car requires careful planning and execution. Follow this guide to achieve a professional finish.
Step 1: Assess the Condition
Start by inspecting the car’s body for rust, dents, or any damage. Take your time to evaluate all areas, including undercarriage and wheel wells, as these spots are often overlooked.
Step 2: Gather Tools and Materials
Compile all necessary tools such as sanders, body filler, paint sprayers, and safety gear. Acquire high-quality primer, paint, and clear coat suitable for vintage cars.
Step 3: Remove Old Paint
Use a paint stripper or a sanding tool to carefully remove existing paint. Be mindful of the underlying metal and avoid excessive heat that could warp the surface.
Step 4: Repair Surface Damage
Address any dents or rust by applying body filler to damaged areas. Once it hardens, sand it smooth, ensuring a seamless transition between the old bodywork and the repaired areas.
Step 5: Sand the Entire Surface
Sand the entire body of the car with varying grits of sandpaper, starting with coarse and moving to fine. This step will create a smooth base for paint adhesion. Ensure all surfaces are clean and dust-free afterward.
Step 6: Apply Primer
Spray or brush a coat of primer over the entire surface. Primer serves as a bonding agent and helps the paint to adhere properly. Allow it to dry completely as per manufacturer’s instructions.
Step 7: Paint Application
Choose a paint color that suits your vintage car’s character. Apply at least two coats of paint, allowing each coat to dry fully before applying the next. Use even strokes to avoid drips or uneven coverage.
Step 8: Clear Coat
Once the paint has cured, apply a clear coat to protect the paint and enhance glossiness. This layer will provide additional durability against the elements.
Step 9: Final Sanding and Polishing
After the clear coat has dried, lightly sand with fine sandpaper to remove any imperfections. Follow up with a polishing compound to achieve a mirror-like finish on your vintage car.
Step 10: Reassemble and Enjoy
Once the paint job is complete, reattach any parts that were removed during the restoration process. Step back and appreciate the hard work that has transformed your vintage car.
Maintaining Authenticity: Sourcing Original Parts for Classic Cars

Restoration of vintage cars involves meticulous attention to detail, particularly when it comes to sourcing original parts. Authentic components not only enhance the aesthetic appeal but also ensure that the vehicle retains its historical integrity. When embarking on this journey, it is crucial to understand where and how to find these parts.
Start by connecting with classic car communities and forums. Enthusiasts often share valuable resources, reviews, and recommendations for reputable suppliers of original parts. Additionally, attending vintage car shows and swap meets can provide unique opportunities to discover rare components that may not be available online.
Consider reaching out to specialty shops that focus on specific makes and models. Many of these businesses keep stock of original parts or can guide you to sources that do. Networking with other restorers can also lead to leads on original components that others may have sourced successfully in the past.
Online platforms can be a goldmine for finding original parts. Websites like eBay and dedicated classic car marketplaces allow you to narrow your search to specific models and years. However, it is essential to verify the authenticity of the parts before purchasing. Look for detailed descriptions, provenance documentation, and ratings from previous buyers.
Reproductions of parts can often be found as well, but they may lack the authenticity that comes with original components. While sometimes necessary for functionality, it is advisable to use originals whenever possible to maintain the value and authenticity of the restoration.
Lastly, be patient throughout the process. Sourcing original parts can be time-consuming, but the effort is worthwhile when you see your vintage car restored to its former glory. Each authentic piece contributes not only to the car’s performance but also to its story, preserving the legacy of automotive history for future generations.


